Munchline Monitors
“Welcome to Mama Natures Munch Room” banner

This is the banner to be hung at the entrance to Mama Nature’s Munchroom activity area where the three parts of the activity occur. The introductory portion of the activity (explaining munchlines with the sun & cord, handing out the training badges) should be done outside of this area, but it good is this banner can be seen from where the introduction takes place.
Note that the banner pictured here could be improved by having the sun picture more closely resemble the sun concept logo, with 12 rays going out, each curved as in the logo.
Welcome Banner
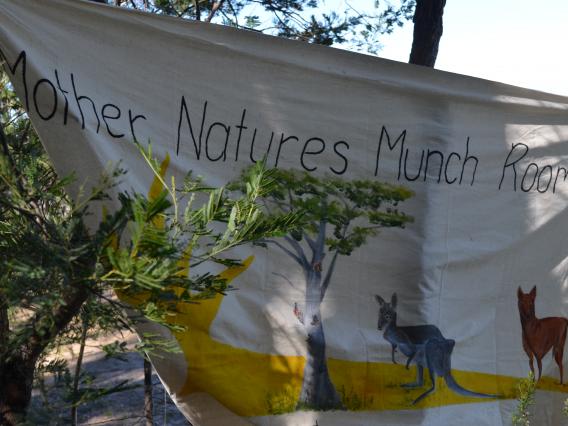
Another example of a banner, from Brewongle Environmental Education Centre, Australia.
Bib with concept logo for energy
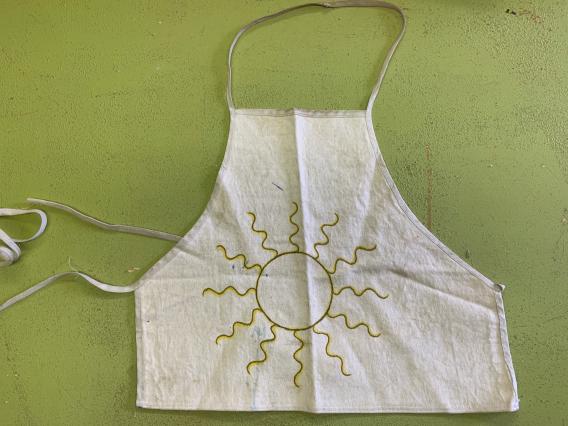
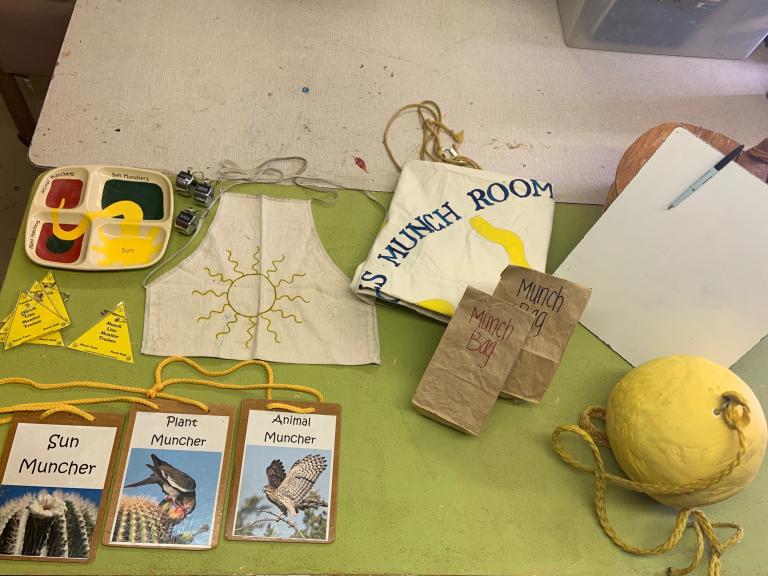
As in each of the four concept activities, the leader wears a bib or apron with the appropriate concept logo prominently displayed.
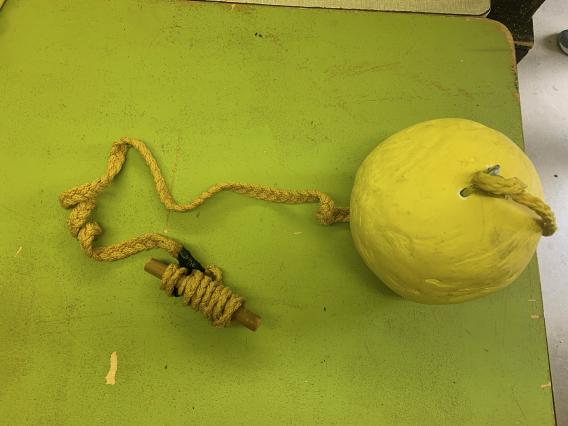
Sun with cord fully unraveled
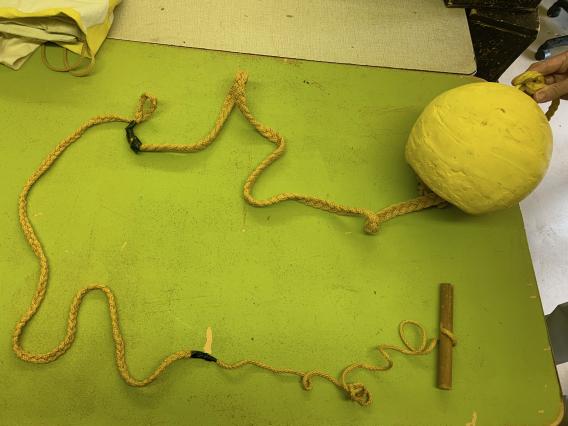
This is a photo of the sun with its cord used in the introductory portion of the activity. The sun is typically hung from a tree branch, with the cords rolled up onto a piece of wood and inserted into the sun through a hole in the bottom of the sun. The sun can be made from plaster, paper maché, or similar materials. We have often used gauze with plaster, which is commonly used for medical casts for broken bones. The sun should be painted yellow to match the yellow used throughout the activities. The cord needs to be three different thicknesses as shown. We have typically used a braided macramé cord for this (and used the same cord for all of the activities so that the colors and textures match, helping to make the energy and materials common across the activities). Depending on the thickness of the cord you use, you can often use the cord as it is sold for the middle part of this extended cord, since it often comes as a braid of three cords. Then we unwind the three braids to get the thinnest cord for that section of this extended cord and braid together cords to make the thickest section. Note that the cord pictured here is not the same bright yellow as on the sun, etc. It has been heavily used and so has darkened a bit.
Sun with cord partially unraveled
Here is the sun with the cord partially rolled up.
Sun with cord fully rolled
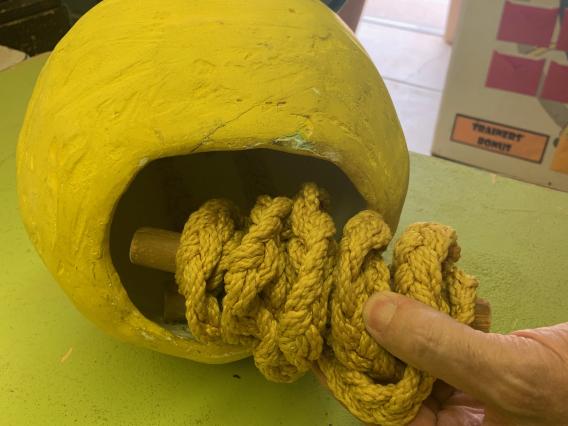
Here is the sun with the cord ready to be inserted in the sun.
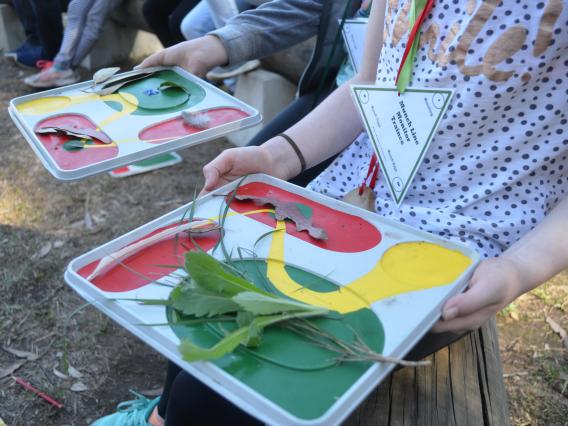
Munch Tray

The munch tray pictured here is the one available for purchase from IEE. The trays have not been painted yet, so you will need to paint them and label them as illustrated in this photo. You can use a different tray, if you are able to find something appropriate locally. Your tray does not need to exactly match the size and shape of this tray, but is should have three separated compartments as this one does, and it should also have one additional area for the sun. On hard plastic as in the tray IEE sells, enamel paints tend to work well and last a long time. Another advantage is that participants can use grease pencils or similar markers to indicate things they could not physically gather; then those markings can be wiped off after the activity. When painting the trays, be sure to use bright colors; the yellow should match the color of the yellow cord used in the activity as closely as possible. The path of energy from the sun through the sun muncher, plant muncher and animal muncher sections should gradually diminish, as shown. Also, be sure that the plant munch section is colored red (for animals) with a green circle inside (to show animals eating plants).
Munch Tray
Another type of a munch tray. Note that the sections should be labeled. From Brewongle Environmental Education Centre, Australia.
Munch bags with items
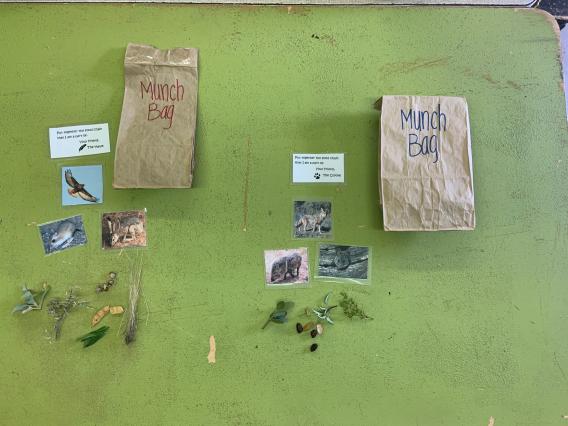
In the US, we use munch bags because they are very familiar to participants. In some parts of the world, munch boxes or some other type of container are more appropriate. In whichever style makes the most sense for you, there are some important things to keep in mind.
First, you will need a munch bag for each small group of 2-3 students, so you will need several bags. You really just need two different sets, as shown here, and then you can have several duplicates of each. The labels are of different colors so that it is easy for the groups to exchange bags after the first round so that get a chance to try the other set, if time allows.
Each bag should contain a note from a top-of-the-food-chain animal (animal muncher) as described in the conceptual encounter description. Three types of items are required to be in the bag: 1) one thing to represent the animal muncher who wrote the note – this could be a photo or something real, such as a feather to represent a bird; 2) two or more animals that the animal muncher would eat – again, either photos or real items; 3) several (at least 4) different sun munchers that the plant muncher would eat. Overall, it is good to have at least some real objects in each bag rather than only photos; plants, of course, are the easiest. Most importantly, be sure to have at least two plant munchers and several sun munchers to help ensure the participants see that munch lines are more complicated than just an animal muncher eating only one kind of plant muncher that eats only one sun muncher.
Munch Bag
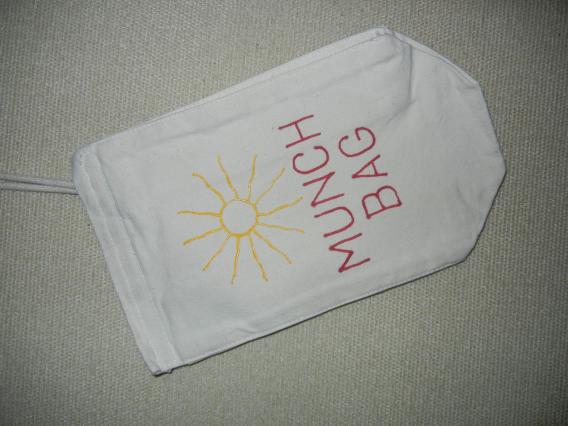
A cloth munch bag.
Munchline
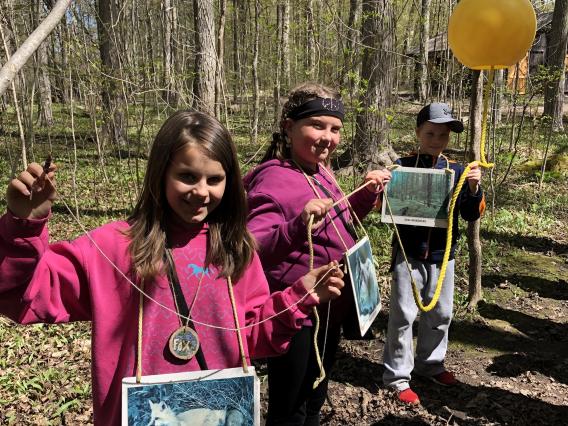
Participants demonstrating the Munchline. From Island Lake Outdoor Ed Center, Canada.